Showing posts with label part. Show all posts
Showing posts with label part. Show all posts
Monday, February 24, 2014
HOW TO LINE A DRAWER WITH WALLPAPER part 1
 |
| BEFORE AFTER |
With 5 cuts and 10 folds you can have this ...

Part 1 shows you how to cut and fold,
Part 2 will teach you a unique way to adhere it.
Start with your drawer upside down.

Cut your paper long enough to cover the bottom and sides - Cut 1

Next fold the sides tight to the drawer sides - Fold 1 & 2

Turn your drawer over and lay your folded paper inside.

Decide how far up the front and back you want your paper and crease it - Fold 3 & 4

Remove the paper from the drawer and cut the 4 corners,
One straight cut to the front and back crease you just made.


You can see below the cuts that make your corners - Cut 2,3,4,5
 |
| Note: The paper is curling showing you a triangle, it is just straight cuts. |
Paper back in the drawer fold the 4 corner flaps down - Fold 5,6,7,8

Lift up the 2 side panels.


Fold over the excess paper hanging over the top of both side - Folds 9 & 10


There is your pretty drawer liner.

Part two will show you a unique way of
adhering non pasted wallpaper.

Part two can be found here
and this wallpaper can be purchased here
Other tutorials can be read here
Showing this how to at:


Thursday, February 20, 2014
Finnish Kantele Build Part 3 framework and preliminary sanding
Hi Everyone,
Well, Ive gotten the framework for the kantele cut out and glued in place:

...and heres the top after a preliminary sanding:

While I was waiting for the glue to dry, I made and screwed up a birch spoon so I decided to make it into a salad fork and it kinda worked. I dont know why I havent made a fork before. This came out a little ragged looking but I may return to this at a later day. Im going to avoid the deep tines you see here:

And here are some spoons that are almost finished and one out of apple wood which is ready to be carved:

And Ive damaged two of my carving gouges today. One I dropped on the concrete floor and the cutting edge of the other chipped while I was carving a spoon bowl. I tried to fix the one I dropped and it didnt work out. I may have to send this out for sharpening. The other one has a very deep chip and Im not sure what Im going to do with this.
Anyway, Im finished for the day. Tomorrow Ill sand the kantele some more and Monday Ill look into the pins and strings for it.
More Later,
VW
Read More..
Well, Ive gotten the framework for the kantele cut out and glued in place:
...and heres the top after a preliminary sanding:
While I was waiting for the glue to dry, I made and screwed up a birch spoon so I decided to make it into a salad fork and it kinda worked. I dont know why I havent made a fork before. This came out a little ragged looking but I may return to this at a later day. Im going to avoid the deep tines you see here:
And here are some spoons that are almost finished and one out of apple wood which is ready to be carved:
And Ive damaged two of my carving gouges today. One I dropped on the concrete floor and the cutting edge of the other chipped while I was carving a spoon bowl. I tried to fix the one I dropped and it didnt work out. I may have to send this out for sharpening. The other one has a very deep chip and Im not sure what Im going to do with this.
Anyway, Im finished for the day. Tomorrow Ill sand the kantele some more and Monday Ill look into the pins and strings for it.
More Later,
VW
Tuesday, February 11, 2014
Bench Project Part III
About a million years ago, I started designing a new bench (sitting not work) to replace an existing bench that was on deaths doorstep. Last week I put saw to wood and got started. Heres the progress so far:

What? It doesnt look familiar? Well, it has been a while since you saw the design. You remember, I worked on it forever. Heres a reminder:

There, see it now? No? Hmm. Yeah, probably not. Seems like I completely abandoned that design and just started building something different without a whole lot of thought going into it. How unlike me.
This one is supposed to be more "church pew like". Well see...
Oh, and the original bench? The one that was about to fall apart. Its still there. Even though it is not well made, it is made of real wood. I just bang the doweled joinery back together every other day and it carries on - a daily demonstration of the power of real wood. Try that with pressed sawdust!
Monday, February 10, 2014
Bench Project Part II
Okay, I finished the "sketch" of the new bench design. "Sketch", because I didnt actually draw it - its more of a photo shop type deal. I started with a photograph of a bench that I liked, but it wasnt quite right. I decided to try an experiment with the computer; it was fun, and frustrating too.
First, I cut the bench out of the original picture - fairly sloppy, as I was none too sure this would even work:

Then I did the following to get the first version of the sketch:
1. Made "repairs" to the bench - missing back slat etc...
2. Transformed to B&W - just thought it would look better this way...
3. Cut a chunk out of the middle of the bench to shorten the overall length.
4. Merged the remaining pieces back into one bench - you can still see the "scar" if you look closely, its particularly easy to spot in the bottom slats...
5. Reconfigured the back and side slats. Basically, every two slats where joined into one wider slat - so 14 back slats became the 7 in the final design.
6. Ran a "pencil sketch" filter to make the image more sketch like; this also helped to blend the changes/additions into a more uniform whole.

Of course the bench will need a cushion, so for the second version I did the following:
1. Created a virtual cushion for the bench.
2. Shaded the cushion for more of a 3D effect.
3. Applied a texture filter to give the cushion a more realistic surface.
4. Applied the same "pencil sketch" filter to the cushion so it would look like it belonged in same sketch as the rest of the bench - well, sort of...
Now I need to work up some measurements from the images, make adjustments as required, and get to work!
Thursday, February 6, 2014
Racking The Quilts Part II
The first bit of proper fabrication on the Quilt Rack was to joint the feet to the legs. I did this using my Domino XL. In order to accommodate the curves they would later be shaped to, I had to use different length Dominos. This is the first time I’ve used the XL. It’s a wonderful beast. Given the size (and especially the length) of the available 14 mm Dominos, the feet should stay attached to the legs for a very long time.
After the Dominos were mortised I assembled the leg/foot assemblies and clamped them each up with a single parallel clamp. I handled glue squeeze out using the method advocated by Marc Spagnolo, waiting about 20 minute and scraping it off after it’s initially gelled.
Once the leg/foot assemblies came out of the clamps, I transferred the cross member locations to the boards using my stop rules. I didn’t actually mark or transfer the Domino mortise locations, just the outline of the square (not yet rounded) cross members.
To mill the Domino mortises in the legs, I clamped a piece of wood to the leg even with the edge of the cross member to act as a fence. Then I set the base of the domino against the fence, centered it on the width of the cross member and mortised. To mortise the cross members, I used the Domino Trim Stop for Narrow Stock. Because the legs are only about ⅞” thick, I made the mortise deeper in the cross member than in the leg.
With the joinery done, Part III will move on to shaping.
Read More..
 |
| Those Dominos for the Domino XL are awfully big. |
 |
| My roofing Barret knife makes is a great all around knife. |
 |
| Stop rules were used to transfer the cross member locations. |
 |
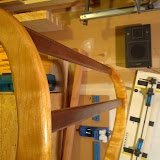
| I clamped a block of wood to the leg to act as a fence to reference the Domino off of. |
 |
| Quilt Rack Photo Gallery |
Wednesday, February 5, 2014
The basics of cabinet making Part 1
I am custom making a set of 6 storage cabinets, and I thought this would be a good opportunity to show some basics of cabinet making, my way. 4 of the 6 cabinets are identical and are 84" high, with 4 shelves each. The other two cabinets are smaller to fit under a window.
After picking up the materials, Ive started cutting the side case work for the tall cabinets. After cutting to depth and height, I am going to make all dado and rabbit cuts before assembling.
If you make your own cabinets, a good rule of thumb on taller cabinets is to always make one of the shelves stationary. This will help tie in and stabilize the unit itself. Ive determined the location of the stationary shelf and have made the appropriate dado cut, and have also dadoed for the bottom shelf. In addition, Ive cut out for the toe kick areas, and have also put a rabbit groove on the backside to accommodate the back panel.
Tip: Whenever you have several of the same cuts (in this case, I have 16 of the same dado cuts to make), always try to use a jig, or some similar setup to make these cuts. Doing so results in level shelves, squared casing, and more! Even the easiest jig can make repetitive work go quicker, and having like-results will be well worth the setup time. Below are some examples of how I use jigs or repetition setups to make all the same cuts go smoothly and quickly. In (roughly) one day, I have all the side casings cut, dadoed, rabbited, and ready to go, including the rails and main shelves for each unit! If you take the time, the results will be well worth it!

Setting up guides for the router, so I can easily make the dados.

Use positive stops to cut all rails to the same lengths.


Tuesday, January 28, 2014
Let There Be Light Part I
A few months ago, my good friend Aristotle Dreher starter Arisitotle Photo. In order to assist with his fancy studio shots, he asked me to make him a light ring. He’s a good friend, who’s done all my shirt and blog design work, so how could I say no (it also seemed like an interesting project)?
 |
| The raw materials. |
The light ring consists of 12 light sockets arranged in a circle. The middle of the circle is open and the camera is placed there and the photo taken through the ring. This provides balanced light on all sides of the image (or at least this woodworker thinks it does).
 |
| Determining the ring layout. |
I began the light ring project by buying 12 cheap plastic light sockets. I asembled them in a circle, and used that to determine the size of the ring. I also used the width of their bases to determing the width of the ring. I left about ½” of space between the sockets and on the inside and outside edges.
The ring itself is constructed from two (2) pieces of Baltic Birch plywood. The front piece is ¾” thick. This was the first piece I made. Because all of the circles are referenced off the center, I worked from the outside to the inside so that I didn’t cut out the middle and then realize I still had to reference it.
After determining the outside diameter of the ring, I marked it out and cut close to the line with my jig saw. Then I built a trammel out of scrap Baltic Birch and routed exactly to the line with a fixed base router and ¾” diameter straight bit.
 |
| The outside is milled. |
Once the outside circle shape was finished, it was time to route the wire trough. This trough is centered on the width of the light ring. I made it using the same ¾” straight bit. I used a small piece of wire to determine the proper depth using relative dimensioning.
 |
| When routing with a trammel, plunge routers are more versatile. |
 |
| The center trough is milled. |
I routed the center trough in three (3), roughly equal depth passes. The feed rate was nice and slow and I thoroughly vacuumed between passes. It still resulted in a bit of burn on the wood and on the router bit. Since it’s a functional (rather than aesthetic) piece, I’m not sweating any burn.
 |
| Just about done with the front ring. |
Once the Center trough was done, I re-set the trammel again and hit the inside of the ring. I paused briefly and considered switching to a narrower bit for the inside (as I only needed to cut through, not create a trough wide enough to house wire), but since the trammel was already set up for the ¾” bit in the router I just went ahead and routed. I again made it though in 3 passes and had about the same level of burning as I did for the trough.
 |
| The connecting trough. |
I finished the center piece by routing one (1) more trough connecting the center trough to the outside edge at the bottom. This trough will allow access for the power cable. I first made this trough with a pattern bit to keep it straight, but when it proved too shallow, I deepened it with router freehand.
Next, on to the back . . .
Bathroom Stuff part II
Its been so long since Ive posted that I think the pageviews counter on the blog has started going backwards. Basically Ive had this post going for a while now and just havent finished it off. This post was actually started over a month ago...TONIGHT, I SHALL FINISH AND POST IT SO I CAN MOVE ON TO OTHER PROJECTS!!!
I last left off with a single cabinet door not quite finished. Since then Ive knocked out the other four, plus three new drawers. Heres the breakdown:
I had a big problem with tearout when I was fielding the panels for the doors. There were a few panels with sections of sappy, knotty bits that just wouldnt plane nicely and left a really rough surface.

For those I just took a little putty and smoothed out the bad parts.

A few of the joints also had some unsightly gaps which required wood filler:

Soon I had finished constructed the necessary five doors:

Then it was off to the sander:
 This setup is great: Ive got the Shop Vac hooked up the sander, but Ive also got a switch from Sears that turns the vacuum on automatically when I turn on the sander. Having the hoses and wires hanging from the ceiling also makes sanding a lot easier.
One last touch on the doors was a little ogee around the perimeter:
 Looks nice, right?
Well, I certainly screwed up one of them pretty bad: whats wrong here?
 Yep, I routed the ogee on the wrong side of the door...time for some surgery.
First I had to cut the screwed-up piece off:
 Thats my new saw in the foreground. Its a Bridge City Tool Works Kataba Meiko. It has an unusual tooth pattern that lets it make crosscuts extremely fast. I got it on sale and am really pleased with it. Yeah, I said I was getting away from Japanese saws...oh well.
Then I had to clean up the saw cuts so that the new frame member would seat correctly; for this I used a shooting board. I dont think Ive demonstrated this before on the blog, but the shooting board is extremely useful:
 Essentially, the shooting board lets you use a bench plane to trim ends very precisely and accurately. It holds the piece at 90 degrees to the path of the plane. Here Im using it to clean up the saw cut so that the new frame member will seat squarely.
I suppose I could have gone to a lot of trouble and created loose tenon joints for the repair, but that would have been a ton of trouble (unless someone wants to buy me a Festool Domino...Any takers? Anyone?)
So I ended up using the old through-dowel method. It gets the job done:

Paint em and done:


Read More..
I last left off with a single cabinet door not quite finished. Since then Ive knocked out the other four, plus three new drawers. Heres the breakdown:
I had a big problem with tearout when I was fielding the panels for the doors. There were a few panels with sections of sappy, knotty bits that just wouldnt plane nicely and left a really rough surface.
For those I just took a little putty and smoothed out the bad parts.
A few of the joints also had some unsightly gaps which required wood filler:
Soon I had finished constructed the necessary five doors:
Then it was off to the sander:
One last touch on the doors was a little ogee around the perimeter:
Well, I certainly screwed up one of them pretty bad: whats wrong here?
First I had to cut the screwed-up piece off:
Then I had to clean up the saw cuts so that the new frame member would seat correctly; for this I used a shooting board. I dont think Ive demonstrated this before on the blog, but the shooting board is extremely useful:
I suppose I could have gone to a lot of trouble and created loose tenon joints for the repair, but that would have been a ton of trouble (unless someone wants to buy me a Festool Domino...Any takers? Anyone?)
So I ended up using the old through-dowel method. It gets the job done:
Paint em and done:
Now time for the drawers. Usually for drawers that protrude beyond and/or overlap the actual cabinet, the drawer box is constructed and then a face piece is attached to the front of the drawer. I decided to try a one-piece front that both contains the dovetail pins and the overlapping face. Claro? Probably not, but pictures will help a lot, Im sure.
Heres my drawer front blank:
I then used the Stanley 78 with depth stop to run a rebate along both long-grain edges.
Then I connected those two rebates with cross-grain rebates with my skew rebate plane:
So perhaps now you can see the drawer front take shape. The rebates create the part of the drawer that will overlap the cabinet.
Heres what makes the one-piece drawer front difficult:
That overlapping section of the drawer front makes transfering the dovetail locations very difficult. The marking knife I usually use for this wouldnt fit down in there so I had to use a pencil with the graphite extended so far out that it probably broke four or five times. Note to self: use thinner stock for the drawer sides next time.
Once the pins were marked out, the overlapping section further complicated things by getting in the way of waste removal operations:
In the end I prevailed...not once...
...not twice...
...but three times:
And the crowd goes wild!!!
I would also like to show off my firewood collection to the world:
Things were pretty lean for a while there, but Im sleeping much better now. There is actually still a fair amount left to split too...anyone need some stress relief?
Heres a weird coincidence: my birthday is only about 2 month away and Chris Schwarz is selling a bunch of his loot. *hint**hint*
Thats all for now.
Wow! I actually finally posted this!
Subscribe to:
Posts (Atom)