Showing posts with label the. Show all posts
Showing posts with label the. Show all posts
Wednesday, March 5, 2014
Finishing the cajon and rubbing out a finish
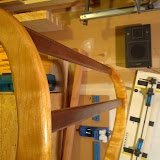
Heres my completed cajon. It really sounds good!

*****
Mere Minutes
Rubbing out that lacquered finish. Heres a simple technique I like to use.
Read More..
*****
Mere Minutes
Rubbing out that lacquered finish. Heres a simple technique I like to use.

Monday, February 24, 2014
NEW CHINA NEW BOOK SHELF AND THE WAY WE LIKE TO LIVE
For several weeks we have been searching for some new bowls on our Saturday morning outings. Some of our soup bowls have broken and we found ourselves constantly frustrated without the same amount of dishes as we were use to. Im happy to say that last Saturday we finally found some new bowls we really really liked.  |
| Our new English China bowls |
Our every day dishes are mostly second hand finds that we fall in love with.
We have 6 of this and 4 of that and we prefer it that way.
We once bought a box of country yellow mugs with matching salad plates and for good measure
two additional plates with the same pattern but in green.

We have also found some unusually shaped pieces, including this ginkgo plate and cabbage bowl.

But most of all we like purchasing fun patterned pieces that we have learned
not to be afraid of and to enjoy using them every day.

We ended up paying $2 each at a yard sale for our new bowls,
we simple couldnt resist the pink thistle design.
 |
| Alfred Meakin - Marigold - Astoria Shaped |
The weather here in BC has been great for yard sales and for painting furniture


Saturday, February 22, 2014
When you get to the end of your rope
. . . tie a knot and hold on" Thats how the saying is supposed to go. At one point several years ago I worked for an Operating Room that was going through a lot of changes. Our charge nurse found this cute little saying and thought she would burst morale, little did she fully understand what critics an OR staff can contain. Not that Im proud of it now, but my younger, more passive aggressive self walked around one evening with a sharpie and modified every sign I could to read "When you get to the end of your rope, tie a noose and hang yourself." The curse is I took what could be an up beat reminder to stay happy and focused and drowned it in my defeatist sarcasm forever. Now whenever I think of that saying, or hear someone say they are at the end of their rope, a noose is the only thing that comes to mind.
I am kind of battling that same mentality right now and all I have to do is convince myself to hold on and well come out the other side soon. I also have to remind myself to stay away from the proverbial gallows pole. In my quest to refurbish, renew and add to my hand tools I am starting to walk the line. Some of these items have been used and abused by myself for a few years, and god knows how long by others before they got to me. I have learned a ton along this curve and god knows they were needed lessons, I see the need for a book out there to help others walk a similar path. (maybe I will write that myself one day because I havent found one that I think does the entire process justice) but the truth is Im not a woodworker because I like to MAKE tools, Im a woodworker because I like to USE tools to MAKE sawdust. And though there has been some of that along the way, I feel like I am putting in a lot of work, and in my conscious mind I know Im making progress and doing well, but in my subconscious mind Im doing a lot of work and there is not much extra or new to show for it. Mostly I am working on the tools I own, not adding new ones, so I see nothing extra or added in my minds eye to prove progress, and I get restless at times when I see no progress.
Its the difference between hanging drywall and finishing drywall. Hanging drywall is very satisfying, you have bare studs before you, and you get to work. Several sheets up and you can see progress. Several more sheets and you have transformed bare studs into a wall. Then comes the muding, taping, and sanding to finish the drywall. You still know you are making progress, but you feel like you are covering the same ground again and again, revisiting the same dimple in the wall over and over. Hanging drywall - very gratifying, finishing drywall requires more persistence and discipline.
I guess I still have to work on the discipline part a bit.
The planes were finished today, just the scrub plane in the mail to go. For good measure I also took apart all my spokeshaves today and sharpened them as well. So the planes are done (again minus 1) so I set up to sharpen the last two saws of the four brothers. Then I made the mistake of coming upstairs to get a drink and take a break. I never made it back down to the shop. Instead my wife and I ended up taking an impromptu Saturday afternoon nap together. (I must admit, that was pretty gratifying as well)
Next on the agenda is remaking handles for my bench chisels. Out with the crap poly-plastic handles and in with some nice oak wooden ones. The trick will be making them without a lathe set up... Rasp, drawknife, spokeshave, and scraper card I guess. Well see how it goes. Anyhow until then
Cheers
Oldwolf
Read More..
I am kind of battling that same mentality right now and all I have to do is convince myself to hold on and well come out the other side soon. I also have to remind myself to stay away from the proverbial gallows pole. In my quest to refurbish, renew and add to my hand tools I am starting to walk the line. Some of these items have been used and abused by myself for a few years, and god knows how long by others before they got to me. I have learned a ton along this curve and god knows they were needed lessons, I see the need for a book out there to help others walk a similar path. (maybe I will write that myself one day because I havent found one that I think does the entire process justice) but the truth is Im not a woodworker because I like to MAKE tools, Im a woodworker because I like to USE tools to MAKE sawdust. And though there has been some of that along the way, I feel like I am putting in a lot of work, and in my conscious mind I know Im making progress and doing well, but in my subconscious mind Im doing a lot of work and there is not much extra or new to show for it. Mostly I am working on the tools I own, not adding new ones, so I see nothing extra or added in my minds eye to prove progress, and I get restless at times when I see no progress.
Its the difference between hanging drywall and finishing drywall. Hanging drywall is very satisfying, you have bare studs before you, and you get to work. Several sheets up and you can see progress. Several more sheets and you have transformed bare studs into a wall. Then comes the muding, taping, and sanding to finish the drywall. You still know you are making progress, but you feel like you are covering the same ground again and again, revisiting the same dimple in the wall over and over. Hanging drywall - very gratifying, finishing drywall requires more persistence and discipline.
I guess I still have to work on the discipline part a bit.
The planes were finished today, just the scrub plane in the mail to go. For good measure I also took apart all my spokeshaves today and sharpened them as well. So the planes are done (again minus 1) so I set up to sharpen the last two saws of the four brothers. Then I made the mistake of coming upstairs to get a drink and take a break. I never made it back down to the shop. Instead my wife and I ended up taking an impromptu Saturday afternoon nap together. (I must admit, that was pretty gratifying as well)
Next on the agenda is remaking handles for my bench chisels. Out with the crap poly-plastic handles and in with some nice oak wooden ones. The trick will be making them without a lathe set up... Rasp, drawknife, spokeshave, and scraper card I guess. Well see how it goes. Anyhow until then
Cheers
Oldwolf
Wednesday, February 19, 2014
The Basic Landscaping Equipment You Must Have
When landscaping for our own home or as a career, you got to have the most important landscaping equipment hand. Dong so will help you do the job easier and faster, and not to mention, more creatively. Among the must haves are the two classifications of landscaping equipment; the landscape making and the landscape maintenance equipments.
These tools and equipments will still vary according to where and what it will be used to. For example, you are planning to landscape a whole acre; that will require huge trucks, trailers, mixers, and loaders to move around soil and stones from one place to another. Pumps are also required to make artificial hills, lakes, and other beauteous additions. But if you are planning for residential landscaping only, then that will require smaller landscaping equipments, too.
Landscape making equipments include lawn mowers, lawn tractors, and other tractor-mounted equipments for moving around soil, gravel, stones, and other materials. Blowers, leaf suckers, sprinkler system, snow throwers, hedge trimmers, and garden utility loaders are also important tools in starting out a landscape. After shaping the grounds into desired shape and appearance, its time to put out the secondary tools and landscaping equipments for the task. Lightings and other accessories should be put into place.
In doing so, cutters and electrical wires are very important. In placing plants, pavers, and trees, you will also need shovels, trowels, rakes, wheel barrows, bolos, and sprinkles. When everything is done, its time to finish the task by coloring those parts or areas that needed to be accentuated. Just make sure that the color you will use will compensate the theme of your landscape; therefore, it is important to have a color palette handy.
Now that you already have a landscape, you need a set of landscape maintenance equipments to ensure the design will last according to your time frame. These equipments will also vary on what type of landscape you have as there are landscapes that are made especially for dry conditions, like the Xeriscaping or Souhwestern landscaping. It uses native and succulent plants to favor the sparse water in the Southwest. So it does not require a lot of watering and maintenance as well. But if you have something Mediterranean, like the Tuscan landscaping, it will need abundant maintenance.
Parts of the important maintenance landscaping equipments you will need are sprinklers, daggers, wheelbarrow, bolos, cutters, shovel, lawn mower, and knife. All these will help you restore your landscaping all the time. The frequency of use of these equipments will greatly depend on the type of landscaping as well. But for the purpose of having your lawn, backyard, or swimming pool landscaping properly maintained, it is best to have all these tools and equipments ready all the time.
Landscaping is a very nice enhancement that adds grandeur to the overall appearance of a residence or institution but it needs to be properly maintained. And maintenance doesn’t have to be actually difficult, especially if you have the right tools. So skip the difficulties of having to maintain an almost forgotten landscaped residence by getting just the right tools and equipments for the task.
By doing this, you get the view and overall theme you want for your home while spending less for the maintenance. So before going over a landscaping task, check out if you already have the complete landscaping equipment you need.
Read More..
These tools and equipments will still vary according to where and what it will be used to. For example, you are planning to landscape a whole acre; that will require huge trucks, trailers, mixers, and loaders to move around soil and stones from one place to another. Pumps are also required to make artificial hills, lakes, and other beauteous additions. But if you are planning for residential landscaping only, then that will require smaller landscaping equipments, too.
Landscape making equipments include lawn mowers, lawn tractors, and other tractor-mounted equipments for moving around soil, gravel, stones, and other materials. Blowers, leaf suckers, sprinkler system, snow throwers, hedge trimmers, and garden utility loaders are also important tools in starting out a landscape. After shaping the grounds into desired shape and appearance, its time to put out the secondary tools and landscaping equipments for the task. Lightings and other accessories should be put into place.
In doing so, cutters and electrical wires are very important. In placing plants, pavers, and trees, you will also need shovels, trowels, rakes, wheel barrows, bolos, and sprinkles. When everything is done, its time to finish the task by coloring those parts or areas that needed to be accentuated. Just make sure that the color you will use will compensate the theme of your landscape; therefore, it is important to have a color palette handy.
Now that you already have a landscape, you need a set of landscape maintenance equipments to ensure the design will last according to your time frame. These equipments will also vary on what type of landscape you have as there are landscapes that are made especially for dry conditions, like the Xeriscaping or Souhwestern landscaping. It uses native and succulent plants to favor the sparse water in the Southwest. So it does not require a lot of watering and maintenance as well. But if you have something Mediterranean, like the Tuscan landscaping, it will need abundant maintenance.
Parts of the important maintenance landscaping equipments you will need are sprinklers, daggers, wheelbarrow, bolos, cutters, shovel, lawn mower, and knife. All these will help you restore your landscaping all the time. The frequency of use of these equipments will greatly depend on the type of landscaping as well. But for the purpose of having your lawn, backyard, or swimming pool landscaping properly maintained, it is best to have all these tools and equipments ready all the time.
Landscaping is a very nice enhancement that adds grandeur to the overall appearance of a residence or institution but it needs to be properly maintained. And maintenance doesn’t have to be actually difficult, especially if you have the right tools. So skip the difficulties of having to maintain an almost forgotten landscaped residence by getting just the right tools and equipments for the task.
By doing this, you get the view and overall theme you want for your home while spending less for the maintenance. So before going over a landscaping task, check out if you already have the complete landscaping equipment you need.
Tuesday, February 18, 2014
Further On up the Road
" . . . Some body will hurt you like you hurt me" OK so Im not Clapton but its a great song and it comes to mind as I think about the current project in the shop. For those of you who are newer to reading here, I will catch you up.
Due to the increased focus on hand tools in the Wood Shop Jr. and the need to increase my collection of usable hand tool solutions to help facilitate my Medieval Reenactment hobby, and due to a serious restriction on monetary funds, I decided to go "old school" on my tools. Craftsmen of the day may or may not be able to buy their own tools, but they worked hard to be self sufficient, purchase the steel of the tool from the local blacksmith and fashion the wooden parts on their own. I decided I had to carry on in this tradition. I will briefly list the agenda I decided to follow.
1. Saws: upgrade, sharpen, re-handle and build from scratch all the saws I need. This includes replacing handles on the three bench saws I use (done) Sharpening and reshaping the teeth on the 4 full size saws I inherited (2 down, 2 to go) make from scratch a dado saw (done) wide blade and narrow blade bow saw (almost done) and a frame saw (next on the agenda)
2. Planes: Sharpen, and tune up the planes I own, including my #4 Smoother, #5 Jack, #78 rabit, 2 wooden joiners, and a round bottom Japanese plane. My mini plane and the p.o.s. low angle block plane I have. (my Father in Law has a nicer quality low angle block plane that is coated, I mean coated in rust, I may try to talk him out of it and see if I can refurbish it as well.
3. Chisels: I have several bench chisels I like a lot but they have crappy plastic handles on them, I plan to fix that issue, I will also reshape and resharpen and replace the handles on the cheep hand carving tools I own as well.
4. Clamps: I need to make some simple mostly wood clamps that would be plausible historical usage.
5. Brace and Bits: I want to make an older version of a brace and get bits that will fit into it, preferably spoon bits.
6. generally replace handles and get the kit together
7. build a joiners tool chest and a small joiners style workbench that will break down to travel to faires and festivals.
I know theres other things in here that Ive missed and forgotten, but whatever. Anyhow, tonight I moved on a bit to finishing the saw section of the project, I am 75% done with the bow saws, one more piece to shape after this evening. Heres a few pics of the work I accomplished tonight. after I got the mortise and tenons all cut and finished.


Cheers,
Oldwolf
Read More..
Due to the increased focus on hand tools in the Wood Shop Jr. and the need to increase my collection of usable hand tool solutions to help facilitate my Medieval Reenactment hobby, and due to a serious restriction on monetary funds, I decided to go "old school" on my tools. Craftsmen of the day may or may not be able to buy their own tools, but they worked hard to be self sufficient, purchase the steel of the tool from the local blacksmith and fashion the wooden parts on their own. I decided I had to carry on in this tradition. I will briefly list the agenda I decided to follow.
1. Saws: upgrade, sharpen, re-handle and build from scratch all the saws I need. This includes replacing handles on the three bench saws I use (done) Sharpening and reshaping the teeth on the 4 full size saws I inherited (2 down, 2 to go) make from scratch a dado saw (done) wide blade and narrow blade bow saw (almost done) and a frame saw (next on the agenda)
2. Planes: Sharpen, and tune up the planes I own, including my #4 Smoother, #5 Jack, #78 rabit, 2 wooden joiners, and a round bottom Japanese plane. My mini plane and the p.o.s. low angle block plane I have. (my Father in Law has a nicer quality low angle block plane that is coated, I mean coated in rust, I may try to talk him out of it and see if I can refurbish it as well.
3. Chisels: I have several bench chisels I like a lot but they have crappy plastic handles on them, I plan to fix that issue, I will also reshape and resharpen and replace the handles on the cheep hand carving tools I own as well.
4. Clamps: I need to make some simple mostly wood clamps that would be plausible historical usage.
5. Brace and Bits: I want to make an older version of a brace and get bits that will fit into it, preferably spoon bits.
6. generally replace handles and get the kit together
7. build a joiners tool chest and a small joiners style workbench that will break down to travel to faires and festivals.
I know theres other things in here that Ive missed and forgotten, but whatever. Anyhow, tonight I moved on a bit to finishing the saw section of the project, I am 75% done with the bow saws, one more piece to shape after this evening. Heres a few pics of the work I accomplished tonight. after I got the mortise and tenons all cut and finished.
Cheers,
Oldwolf
Thursday, February 13, 2014
Some details of the Indexer
Here are some details of the indexer I designed. First, the clamps that hold the index bar to the rail are made from 0.75" UHMW. The translucent area in the drawings below are the UHMW. It is in two pieces, the main body and the clamp head. the clamp head has a "V" shaped protrusion that fits into the "V" grove in the side of the guide ridge. It is held in place by the Clamp Knob and Stud. The main body is attached to the index bar with the Attachment Bolt and Knob. There is a small open area between the main body and the clamp head below the Clamp Knob Stud, this allows the clamp head to be tightened against the guide ridge. The index bar is made of 0.375" UHMW and can have two sets of index holes. You simply remove the bar from the clamps, turn it over and reattach. It has been suggested that a strip of pegboard could be used for the bar. I havent tried it yet, but I cannot see why it would not work.
The index pin module is also made of 0.75" UHMW, and has an aluminum Top Plate that traps the pin and spring. The index pin is a 0.25" hex bolt that has had the head cut off and the end rounded over some. The bottom nut on the pin gives something for the spring to push against, the top nut is just to lock the knob in place. The body of the assembly is attached to the SRK with two screws. It sits over the index bar and straddles the guide ridge (for no real reason).
 Alignment of the rail to the center line of the holes to be drilled is accomplished by means of an alignment jig made from an SRK and a section of aluminum angle. First you set the rail with the router bit centered on the center line. I use a brass setup bit that has conical points on each end and a 0.25" and 0.5" shaft (one half each). This sets the distance. then I adjust the alignment guide so the edge of the aluminum angle is on the center line. I then set one end of the rail the proper distance from the line with the alignment guide and loosely clamp that end of the rail to the work piece. Slide the alignment guide to the other end of the center line, adjust and clamp that end of the rail. Go back to the other end and reset if necessary.

I hope that this has answered some of the questions that you might have about the jig. If not dont hesitate to ask.
Read More..
The index bar is made of 0.375" UHMW and can have two sets of index holes. You simply remove the bar from the clamps, turn it over and reattach. It has been suggested that a strip of pegboard could be used for the bar. I havent tried it yet, but I cannot see why it would not work.The index pin module is also made of 0.75" UHMW, and has an aluminum Top Plate that traps the pin and spring. The index pin is a 0.25" hex bolt that has had the head cut off and the end rounded over some. The bottom nut on the pin gives something for the spring to push against, the top nut is just to lock the knob in place. The body of the assembly is attached to the SRK with two screws. It sits over the index bar and straddles the guide ridge (for no real reason).
Alignment of the rail to the center line of the holes to be drilled is accomplished by means of an alignment jig made from an SRK and a section of aluminum angle. First you set the rail with the router bit centered on the center line. I use a brass setup bit that has conical points on each end and a 0.25" and 0.5" shaft (one half each). This sets the distance. then I adjust the alignment guide so the edge of the aluminum angle is on the center line. I then set one end of the rail the proper distance from the line with the alignment guide and loosely clamp that end of the rail to the work piece. Slide the alignment guide to the other end of the center line, adjust and clamp that end of the rail. Go back to the other end and reset if necessary.I hope that this has answered some of the questions that you might have about the jig. If not dont hesitate to ask.
And The Winner Is!

Before I announce the winner,
Ill explain the reason I have wood-putty on my fingers.

Still working on the hatch cover.
No matter how tight the pieces fit together there are always spots to putty in.

Lots of sanding on this boat project but it will all be worth it when we are done.

All the names of everyone who participated are going into my old beat up cowboy hat.

And now for the lucky winner!

Congratulations to Donna Wilkes!
The Rust Goddess wins our $25. Amazon gift card!!
Thanks so much to everybody who participated in our drawing.
We will be having at least one more before Gypsy Rose is finished.
Have a great day and smooth sailing.
Steve

Wednesday, February 12, 2014
The Worlds Most Popular Chair
I lifted this from boingboing because I thought it was interesting.

The International Herald Tribune has put up a fantastic write-up of what might possibly be the worlds most popular chair: the Thonet Model 14. Six pieces of wood — two circles, two arches, two legs — that screwed together have seated more plump, writhing buttocks than any other chair in history.
The No.14 was the result of years of technical experiments by its inventor, the 19th-century German-born cabinetmaker Michael Thonet. His ambition was characteristically bold. Thonet wanted to produce the first mass-manufactured chair, which would be sold at an affordable price (three florins, slightly less than a bottle of wine). Many of his rivals had tried to make similar chairs, but failed and, at first, Thonet seemed doomed to failure too. When his German workshop was seized by creditors in 1842, he moved his family to Austria and opened a workshop in Vienna, determined to try again.
Eventually Thonet succeeded. When the No.14 was launched in 1859, it was the first piece of furniture to be both attractive and inexpensive enough to appeal to everyone from aristocrats to schoolteachers. By 1930, some 50 million No.14s had been sold, and millions more have been snapped up since then. Brahms sat on one to play his piano, as did Lenin while writing his political tracts, and millions of us have perched comfortably on them in cafés. Another admirer was the modernist pioneer Le Corbusier. "Never was a better and more elegant design and a more precisely crafted and practical item created," he enthused.
Peace,
Mitchell
Monday, February 10, 2014
Creating with the Stars Week 1 Upcycle Vote for your favorite!
Hope you all had a great weekend! We finished and submitted our upcycle project for Creating with the Stars!! I cant tell you which project is ours, but I hope that you love it as much as I do!! :)

Stop by East Coast Creative to vote for your favorite project between now and Tuesday at 10 PM EST. Votes will be tallied on Wednesday, and the top 9 will move on to next week.
I was busy last week, so Ill have lots of fun projects/tutorials to share with you a little later this week!
Finally a little weekend wrap up. We had dinner at one of our favorite restaurants, Novo. They have the best outdoor patio on the creek and of course great food!
.JPG)
We also love going here, because Annabelle can come too. She loves duck hunting (see its tail to the right of the middle railing?)
.JPG)
Finally, Sunday was such a pretty WARM day. Weve been having a lot of rain and cool days recently, so it was nice change!
.JPG)
Dont forget to stop by East Coast Creative and vote for your favorite project (it only takes a minute :) Let me know if you can pick mine out of the crowd (of course I cant reply until a little later :)
I cant wait to share the project and tutorial with you after voting ends on Wednesday!
Read More..
Stop by East Coast Creative to vote for your favorite project between now and Tuesday at 10 PM EST. Votes will be tallied on Wednesday, and the top 9 will move on to next week.
I was busy last week, so Ill have lots of fun projects/tutorials to share with you a little later this week!
Finally a little weekend wrap up. We had dinner at one of our favorite restaurants, Novo. They have the best outdoor patio on the creek and of course great food!
We also love going here, because Annabelle can come too. She loves duck hunting (see its tail to the right of the middle railing?)
Finally, Sunday was such a pretty WARM day. Weve been having a lot of rain and cool days recently, so it was nice change!
Dont forget to stop by East Coast Creative and vote for your favorite project (it only takes a minute :) Let me know if you can pick mine out of the crowd (of course I cant reply until a little later :)
I cant wait to share the project and tutorial with you after voting ends on Wednesday!
When the city seeps in
On Design

Three weeks to the day; the time it took for the city to seep in. I recently met a great couple and they asked me to design and build a piece of furniture for their home here in Toronto. The only two guidelines they had for me were to use a darker toned wood and attempt to incorporate some brushed aluminum into the piece. They already have a piece of furniture with an aluminum, decorative inlay and brushed aluminum door pulls. I immediately thought about the aluminum aspect of the piece. As soon as I blended mediums I knew it would have to be more than a simple accent.
Clean straight lines, aluminum and glass, what else says Urban living like this?
Ive always been a fan of the more minimalistic approach to design; the modern movements and European influences. The over-all dimensions were a given due to the space requirements where the piece will be living. A kind of sideboard/cabinet with three sliding doors was my first instinct; but once the pencil went to paper things changed. Things always change from those first initial thoughts to design and then on to construction. Pieces evolve in a natural way, an ordinary process coming round full circle. Ideas seem to blend through the realities of joinery. One thing I want to maintain in the piece is a hand crafted look while still reflecting the machining of this metropolitan landscape. The aluminum aspect was decided on. Two 1 1/4" thick pieces of solid aluminum plating, cut and rounded by means of water jet. These two monoliths will make up the stand/ or legs of the unit; while the wooden carcass will fit perfectly inside the two larger cut-outs in the top portion of the plates. The wood at this point is still un-decided although I keep thinking PAU FERRO (Santos Rosewood) a dark bodied hardwood that will compliment the hand cut dovetailed box which will make up the bulk of the piece. The cabinet will be divided with two solid panels, isolating three separate spaces within. The doors are another design/construction reality altogether. I know I wanted to have sliding doors but now feel theyll eat up too much interior real estate. I decided on hinged doors incorporating glass panels. The first obvious choice for the door joinery would be a kind of frame and panel. This of course would be the obvious choice; and who could ever be satisfied with that? What Ive come up with is a three sided, open~frame and panel; the inside edge of the frame being only glass while the outside of the door solid wood. Full mortise and tenon joinery on the corners, with a kind of suspended glass panel within. A design challenge indeed, but one that will pay off in the final showcase. The interior will also feature glass shelves, securely sitting on Bronze ,threaded support sleeves. A real nice touch to allow the shelves to be adjustable to suit the contents later on.
Again, the initial impression would be three doors to match the three spaces, but now Im thinking on off-setting the aluminum legs and making one larger middle space, incorporating two doors for it and then carry on with two slightly narrower side areas flanking this first mid-section. Designs can change, re-arrange and why not let them? Sketches and diagrams will only show so much to the hand caressing softened edges of exotic hardwoods later on. At this stage of the game, anything is possible, never limit yourself before you even leave the starting gates. Design for the impossible, dream the unimaginable and then finally settle on the realistic. Stay tuned...
Read More..
Three weeks to the day; the time it took for the city to seep in. I recently met a great couple and they asked me to design and build a piece of furniture for their home here in Toronto. The only two guidelines they had for me were to use a darker toned wood and attempt to incorporate some brushed aluminum into the piece. They already have a piece of furniture with an aluminum, decorative inlay and brushed aluminum door pulls. I immediately thought about the aluminum aspect of the piece. As soon as I blended mediums I knew it would have to be more than a simple accent.
Clean straight lines, aluminum and glass, what else says Urban living like this?
Ive always been a fan of the more minimalistic approach to design; the modern movements and European influences. The over-all dimensions were a given due to the space requirements where the piece will be living. A kind of sideboard/cabinet with three sliding doors was my first instinct; but once the pencil went to paper things changed. Things always change from those first initial thoughts to design and then on to construction. Pieces evolve in a natural way, an ordinary process coming round full circle. Ideas seem to blend through the realities of joinery. One thing I want to maintain in the piece is a hand crafted look while still reflecting the machining of this metropolitan landscape. The aluminum aspect was decided on. Two 1 1/4" thick pieces of solid aluminum plating, cut and rounded by means of water jet. These two monoliths will make up the stand/ or legs of the unit; while the wooden carcass will fit perfectly inside the two larger cut-outs in the top portion of the plates.
The wood at this point is still un-decided although I keep thinking PAU FERRO (Santos Rosewood) a dark bodied hardwood that will compliment the hand cut dovetailed box which will make up the bulk of the piece. The cabinet will be divided with two solid panels, isolating three separate spaces within. The doors are another design/construction reality altogether. I know I wanted to have sliding doors but now feel theyll eat up too much interior real estate. I decided on hinged doors incorporating glass panels. The first obvious choice for the door joinery would be a kind of frame and panel. This of course would be the obvious choice; and who could ever be satisfied with that? What Ive come up with is a three sided, open~frame and panel; the inside edge of the frame being only glass while the outside of the door solid wood. Full mortise and tenon joinery on the corners, with a kind of suspended glass panel within. A design challenge indeed, but one that will pay off in the final showcase. The interior will also feature glass shelves, securely sitting on Bronze ,threaded support sleeves. A real nice touch to allow the shelves to be adjustable to suit the contents later on.Again, the initial impression would be three doors to match the three spaces, but now Im thinking on off-setting the aluminum legs and making one larger middle space, incorporating two doors for it and then carry on with two slightly narrower side areas flanking this first mid-section. Designs can change, re-arrange and why not let them? Sketches and diagrams will only show so much to the hand caressing softened edges of exotic hardwoods later on. At this stage of the game, anything is possible, never limit yourself before you even leave the starting gates. Design for the impossible, dream the unimaginable and then finally settle on the realistic. Stay tuned...
FInishing Up the Big Table
 I dont have time to write a long post, but I did promise a potential client I would put up some photos of the table weve been working on ... Also, we picked up the chairs Monday and they are pretty sharp too ... Its our first experience with Danish Cord seats. Nice job by Sandy Sherman Chair Caning of Brookline, Vermont.
 This is the second coat of gloss finish .. the final satin coat will go on probably today
 The eight side chairs
 Close up ... all for now
Thursday, February 6, 2014
Racking The Quilts Part II
The first bit of proper fabrication on the Quilt Rack was to joint the feet to the legs. I did this using my Domino XL. In order to accommodate the curves they would later be shaped to, I had to use different length Dominos. This is the first time I’ve used the XL. It’s a wonderful beast. Given the size (and especially the length) of the available 14 mm Dominos, the feet should stay attached to the legs for a very long time.
After the Dominos were mortised I assembled the leg/foot assemblies and clamped them each up with a single parallel clamp. I handled glue squeeze out using the method advocated by Marc Spagnolo, waiting about 20 minute and scraping it off after it’s initially gelled.
Once the leg/foot assemblies came out of the clamps, I transferred the cross member locations to the boards using my stop rules. I didn’t actually mark or transfer the Domino mortise locations, just the outline of the square (not yet rounded) cross members.
To mill the Domino mortises in the legs, I clamped a piece of wood to the leg even with the edge of the cross member to act as a fence. Then I set the base of the domino against the fence, centered it on the width of the cross member and mortised. To mortise the cross members, I used the Domino Trim Stop for Narrow Stock. Because the legs are only about ⅞” thick, I made the mortise deeper in the cross member than in the leg.
With the joinery done, Part III will move on to shaping.
Read More..
 |
| Those Dominos for the Domino XL are awfully big. |
 |
| My roofing Barret knife makes is a great all around knife. |
 |
| Stop rules were used to transfer the cross member locations. |
 |
| I clamped a block of wood to the leg to act as a fence to reference the Domino off of. |
 |
| Quilt Rack Photo Gallery |
Wednesday, February 5, 2014
The arched top door Minster Oh The exterior layers
With the core of the door complete, its time to make and apply the exterior layers of the unit. Ive selected some wide white oak, which will give the door a more bold pattern. I am taking my normal route of cutting to general length, planing down, and straightening the edges.
However, I want to go one more step with this. Id like the edges that will be together to be nice and snug. So, here is a way to scribe long boards together. My method is to lay two boards side by side, clamp down a straight edge, and run my circular saw between the edges. This will effectively scribe one board to the other, and give me nice tight joints!
In the last picture, I have glued all boards and clamped everything in place. You cant see it, but the core is underneath the clamped layer of oak. I started with the center board and worked my way to the outsides. I made sure to apply a full spread of Titebond III waterproof glue, on the surface that is in contact with the core and also the edges (I use a 3" wide foam brush to spread the glue - works great - then just throw it away).
After this has dried, I will rough trim the edges close to the core, and then do final shaping with the router and a flush trim bit.


Read More..
However, I want to go one more step with this. Id like the edges that will be together to be nice and snug. So, here is a way to scribe long boards together. My method is to lay two boards side by side, clamp down a straight edge, and run my circular saw between the edges. This will effectively scribe one board to the other, and give me nice tight joints!
In the last picture, I have glued all boards and clamped everything in place. You cant see it, but the core is underneath the clamped layer of oak. I started with the center board and worked my way to the outsides. I made sure to apply a full spread of Titebond III waterproof glue, on the surface that is in contact with the core and also the edges (I use a 3" wide foam brush to spread the glue - works great - then just throw it away).
After this has dried, I will rough trim the edges close to the core, and then do final shaping with the router and a flush trim bit.
The basics of cabinet making Part 1
I am custom making a set of 6 storage cabinets, and I thought this would be a good opportunity to show some basics of cabinet making, my way. 4 of the 6 cabinets are identical and are 84" high, with 4 shelves each. The other two cabinets are smaller to fit under a window.
After picking up the materials, Ive started cutting the side case work for the tall cabinets. After cutting to depth and height, I am going to make all dado and rabbit cuts before assembling.
If you make your own cabinets, a good rule of thumb on taller cabinets is to always make one of the shelves stationary. This will help tie in and stabilize the unit itself. Ive determined the location of the stationary shelf and have made the appropriate dado cut, and have also dadoed for the bottom shelf. In addition, Ive cut out for the toe kick areas, and have also put a rabbit groove on the backside to accommodate the back panel.
Tip: Whenever you have several of the same cuts (in this case, I have 16 of the same dado cuts to make), always try to use a jig, or some similar setup to make these cuts. Doing so results in level shelves, squared casing, and more! Even the easiest jig can make repetitive work go quicker, and having like-results will be well worth the setup time. Below are some examples of how I use jigs or repetition setups to make all the same cuts go smoothly and quickly. In (roughly) one day, I have all the side casings cut, dadoed, rabbited, and ready to go, including the rails and main shelves for each unit! If you take the time, the results will be well worth it!

Setting up guides for the router, so I can easily make the dados.

Use positive stops to cut all rails to the same lengths.


Tuesday, January 28, 2014
Woodworking in America Through The Eyes Of My Friends
Ive just about posted all of the content I created and recorded at Woodworking in America 2013. Luckily, my good friends +Tom Iovino, +Sean Wisniewski, +Neal Becker gave me some photos to share. I hope you enjoy. By the way, if you want to see really good photos of WIA13, check out +David Picciutos blog, Drunken Woodworker.
 |
| The Online Woodworking Discussion Panel. |
 |
| Somehow, the let the Modern Woodworkers Association in. |
 |
| The Wood Talk and Giant Cypress guys were let in too, to provide actual information. |
 |
| Yes, Tom talks just as much in person. |
 |
| Neil Zenuk (@twowheelneil) chops some sweet dovetails. |
 |
| Tom likes me! |
Dont forget about the +Modern Woodworkers Association Podcast. We talk woodworking with Guests from around the world of woodworking every other week. Subscribe to the RSS feed or iTunes today.
Subscribe to:
Posts (Atom)