Thursday, March 6, 2014
Clamp storage systems
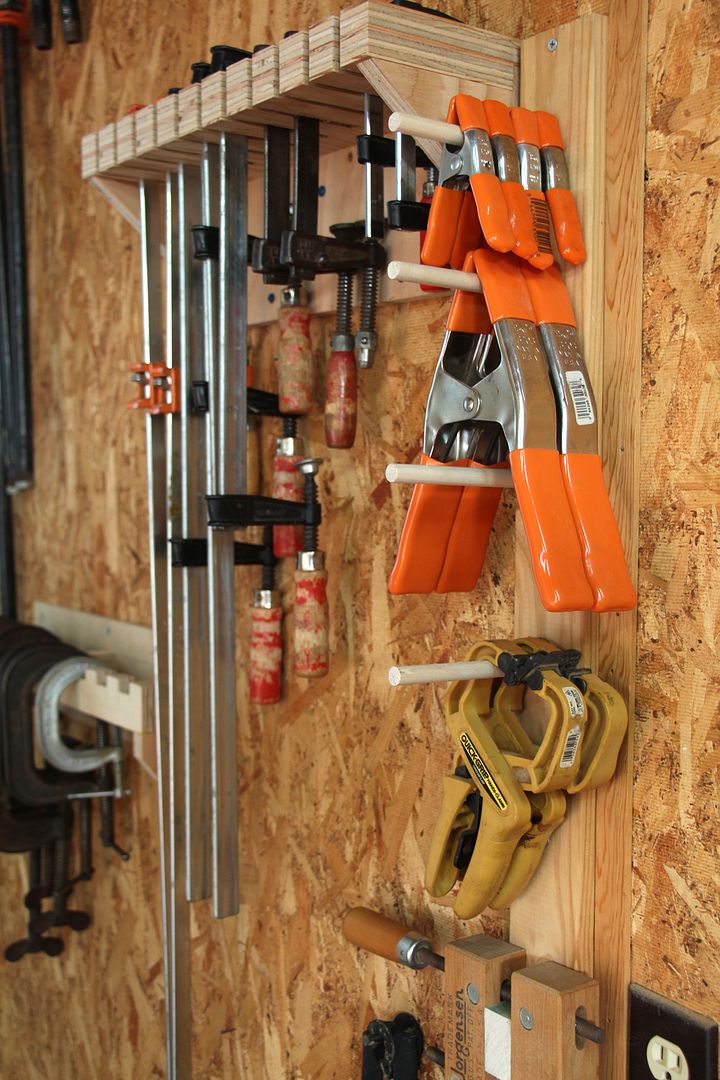
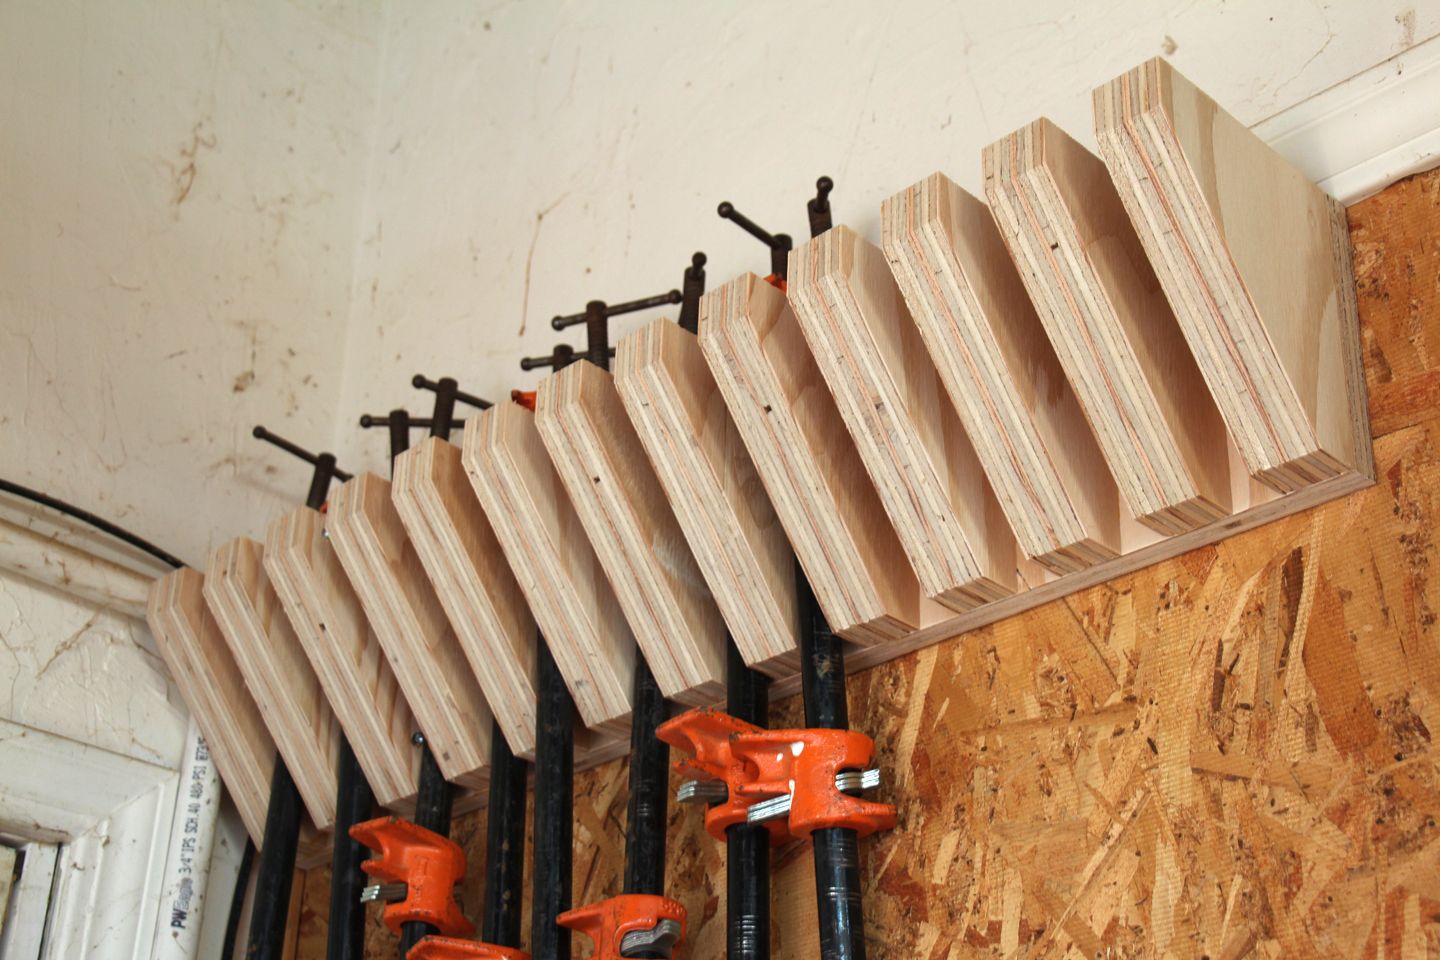
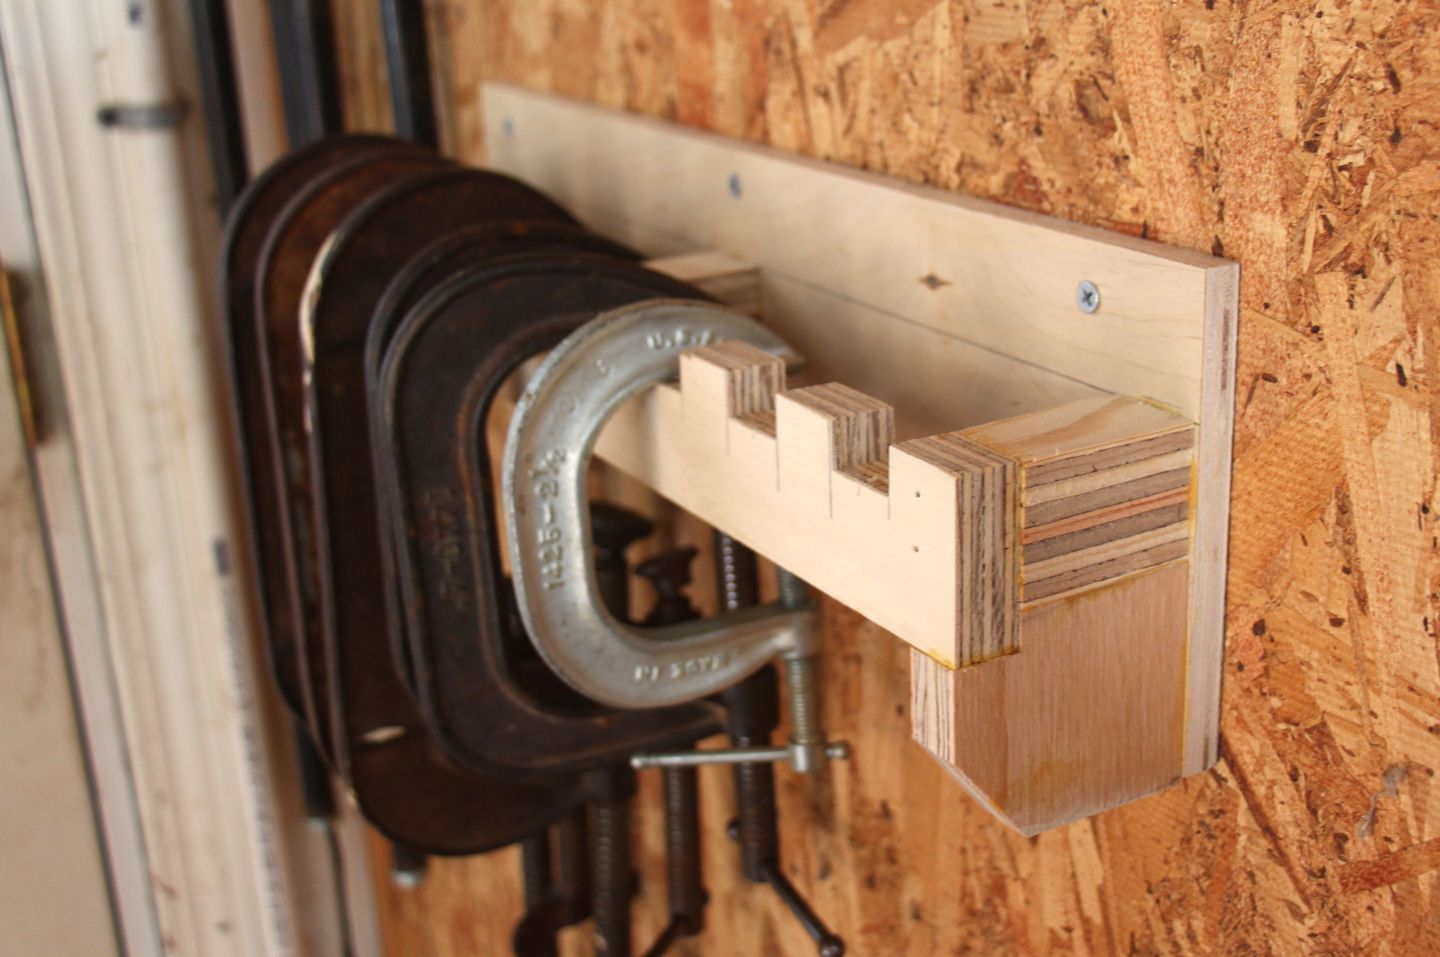
My biggest problem was finding space for them until I had the revelation that there is unused space behind my door. Its not very deep — a little over six inches — but perfect for clamps.
If you would like to try (or modify) any of the clamp racks I came up with, here are plans:
SketchUp file
PDF version
Wednesday, March 5, 2014
More gift ideas
Davide Righi from Italy made this clever calendar from MDF and cut out plywood discs. Each disc swings on a screw to reveal the prize.



Finishing the cajon and rubbing out a finish

*****
Mere Minutes
Rubbing out that lacquered finish. Heres a simple technique I like to use.
interesting summer fashions using everyday power tools
This is the result:

A stylish new look for summer that just screams i want to start middle age early! Were not just talking red Ferrari and new girlfriend middle age were talking pious and chaste.

Anyway the point here is follow the safety precautions. More importantly, after working for a long period of time its easy to get comfortable and even caviler with what you are doing, thats okay, but you should always stay focused on whats going on in front of you. I notice my mind wandering to other things all the time when working on projects, especially on the repetitive aspects that Ive done a thousand times over, thats when accidents usually happen. This is mostly redundant information but i felt it would be an appropriate blog response. I couldnt find the schools shop safety rules on line so i just looked up some general shop saftey rules on google:
GENERAL SHOP SAFETY RULES
1. You must don safety glasses, cover goggles, or face shields
before entering the shop.
2. Shoes must be worn in the shop. No one wearing sandals
will be allowed to enter any shop area. The minimum
footwear must cover the entire foot.
3. Do not operate any equipment unless you are familiar with its
operation and have been authorized to operate it. Questions
regarding the use of equipment should be directed to the shop
supervisor.
4. No work may be performed using power tools unless at least
two people are in the shop area and can see each other.
5. Use the shop vacuum cleaner to remove chips. Never use
compressed air guns to clean clothing and hair.
6. In case of injury, no matter how slight, report it to the shop
supervisor. The campus emergency phone number is 9-911.
7. Contact with harmful chemicals should be reported
immediately Notify campus rescue at 9-911.
8. Machines must be shut off and locked-out before servicing.
9. Do not wear ties, loose clothing, jewelry, gloves, etc. when
operating shop equipment and tie back long hair.
10. Wear appropriate clothing for the job (i.e. do not wear short
sleeve shirts or short pants when welding).
11. Do not work in the shop if you are tired, or in a hurry.
12. Never indulge in horseplay in the shop areas.
13. All machines must be operated with all guards and shields in
place.
14. Do not use your bare hands to remove chips and shavings
from the machine, use a brush or hook.
15. Never use a rag near moving machinery.
16. Do not strike a hardened tool or any machine with a hammer.
17. Practice cleanliness and orderliness in the shop areas. Use
the shop vacuum cleaner. Clean-up before you leave!
18. Keep the floor around machines clean, dry and free from trip
hazards. Do not allow chips to accumulate. Use the shop
vacuum cleaner.
19. Think through the entire job before starting.
20. Before starting a machine, always check it for correct setup
and always check to see if the machine is clear.
21. Do not drink alcoholic beverages before or during a work
session in the machine shop area. Do not bring food/snacks
into the shop.
22. Don’t rush or take chances. Obey all safety rules.
23. If you have not worked with a particular material before,
check the materials safety data sheet (M.S.D.S.) for any
specific precautions to be taken while working with the
material. Also, ask the shop personnel before cutting any
unusual material.
24. Heavy sanding and painting should only be done in well
ventilated areas.
25. Follow all appropriate precautions when working with
solvents, paints, adhesives or other chemicals. Use
appropriate protective equipment. Review the M.S.D.S.
26. Check the condition of power cords and plugs on portable
tools before using them. Do not use a tool that has a worn or
damaged power cord/plug.
27. Always store oily rags in an approved metal container.
Breaking down plywood
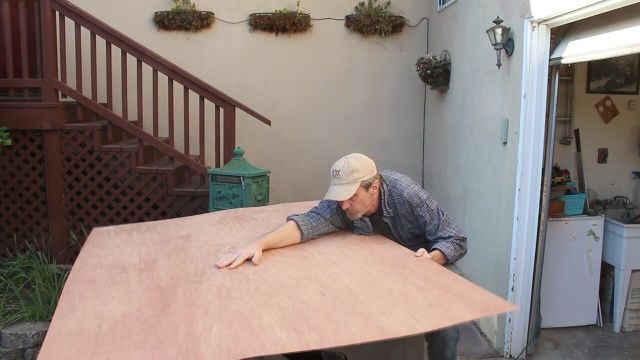
So the trick is to figure out a method to cut the sheets down to manageable sized pieces closer to the sizes needed for your project.
There are many ways to do this. Mostly you just need to figure out how to physically move the full sheet without breaking your back or worse, chipping the plywood edges! I like to cut plywood as soon as I buy it and use my truck as a workbench. After loading plywood into my truck, I rarely have to lift it again.
I then like to set up a straight-edge and make rough cuts, usually a half inch greater than I need, using a circular saw. I have also had success using a jig saw. The idea is to get the pieces small enough to square up on my table saw.
Here are the rip guides I use:
Empire Level 900 edge cutting guide
Kreg Rip-Cut
Accu-Rip
This video is my contribution to "Get Woodworking Week" over at Toms Workbench, a whole week of links and articles just for beginning woodworkers. Check it out.
*****
Nathan Cox Northwest Coast Wood Carving
My earliest exposure to art of the Northwest Coast peoples, or at least the earliest that I remember, came from the Field Museum in Chicago. The collection was tucked away on the main floor, somewhere behind a room full of faceless mannequins dressed in traditional attire from the Great Plains nations. At the back of this room, taking up the entire wall, was a life-size replica of a Pawnee earth lodge. As I remember it, the door into the Northwest Coast/Arctic room was sort of hidden around the back of this lodge (that could have been a decision meant to ease the transition between the two distinct geographical regions, but just as likely the curatorial team had an awkward time finding a good space for that big ass lodge and that was their weird solution*). Whatever the reason, stepping through that doorway always felt like one of those down the rabbit hole experiences to me. And cut to . . .
The gallery was a completely different kind of space. I was large, dark and silent. It still seems a little spooky, even now. I did spend the night in there once, though. It was worth it for that collection. There was the standard artifacts (dogsleds, whaling/hunting paraphernalia, giant crabs, etc.), but what always stuck in my memory was the collection of wood carvings. There is a very distinctive aesthetic associated with Northwest Coast art that makes it instantly recognizable. Wood is the traditional material for most carvings, though the Haida have a long tradition of working in Argillite and many contemporary artists have recently taken up bronze. Whatever the medium, methods are almost universally traditional: artists work their materials using hand tools (axes, chisels, adzes, etc.) and large pieces are erected manually by members of the community. Though the concept and design details often vary based on the needs of the community, themes drawn from mythological, religious, cultural and historical (both societal and familial) sources are especially popular. Figures walk a blurred line between representation and abstraction, with forms that are identifiable as both organic and geometric (or, just as easily, as neither). Deeply-carved lines are complemented by a sparse palette (rarely more than 3-4 colors, if any), enhancing the effects of light and shadow on the pieces surface. Though worked almost entirely by hand, experienced carvers are able to produce a remarkable level of consistency in their treatment of the material, producing near-perfect symmetry and balance. As most objects are worked down from a single mass, joinery is typically minimal (aside from the occasional outstretched wing of a bird, or basic bindings for an articulated mask) and each piece retains strong references to its natural structure.
This faithfulness is not limited to aesthetics, but finds expression in the social life of a piece. As mentioned above, the construction and erection of a totem pole is rarely an isolated act. While the actual production is typically carried out by a single artist or a small group, the commission comes on behalf of the entire community, which takes part in the installation and dedication. Furthermore, once erected, poles are rarely maintained. Instead, in reference to their origins, they are left to the elements until they fall of their own accord (or, in some cases, they are deemed hazardous and removed). This lends to the carvings a sense of placement and fragility not immediately evident from the appearance alone, which allows them to become something more than a narrative or a commemoration. That seems to be the attraction for me. I come for the craft, but I stay for the perspective.
*Now that I think on it, the lodge shared a wall with the Northwest Coast gallery. There was a diorama of a wolf den and some Inuit dwellings on the opposite side. It all makes sense now.


Sources:
http://www.nfb.ca/film/bill_reid (A short documentary from the Canadian National Film Board, featuring Bill Reids construction of a totem pole for the town of Skidegate, BC)
http://www.biographi.ca/009004-119.01-e.php?&id_nbr=7354 (A short biography of Charles Edenshaw, a key figure in the 19th century revival of Haida art)
http://www.royalbcmuseum.bc.ca/MainSite/ (The Royal British Columbia Museum - they have a large collection of Northwest Coast art, although their online catalog is under construction)
http://www.nfb.ca/film/totem_the_return_of_the_gpsgolox_pole/ (Another Canadian National Film Board documentary, dealing with issues of ownership in indigenous art)
http://www.spiritwrestler.com (A Vancouver gallery specializing in contemporary Inuit, Northwest Coast and Maori art)
Tuesday, March 4, 2014
Parlez vous
 This is a lovely example of mid seventeenth century French Classicism. It is characterized by clean (masculine,)line, balance and formality. The movement back to classicisim was a reaction which grew out of the European Age of Enlightenment whos roots were in the Italian Rennissance. It was a return to the Classical formulae of ancient Greece. The Golden Mean etc. Its a far cry from Baroque, (which I absolutely cannot stand, way too overdone.) But like all art, one era reacts in the opposite direction to the present style. Picture Newton, Galileo and Descartes sipping Dom Perignon, invented by a French Monk at this time 1670s,) around fine pieces like this. (I prefer Christall, but that is another story.) Notice the greek column like leg, the beautiful symmetry and proportions. Golden Mean Baby- Squerl
Table Redo with Reclaimed Bowling Alley Flooring


Zero1 symposium and other things
Besides the symposium I got to work with an artist Stephanie Rothenberg with her art show, Best Practices in Banana Time....where she stages a talk show in SecondLife and at the same time in real life time. My job was to be the camera person in secondlife. At the same time while preparing for Stephanies show I was also participating with digital medias red cross project a few of CADREs student which includes me decided to showcase the red cross backpack at the zero1 fair. Our job was to fix up the red cross backpack and getting it ready for Zero1 street fair. Even though the symposium was not what I would hoped it to be, but over all i had an amazing experience and I am very grateful to be apart of something special.
Make a drill bit case
 I have a lot of drill bits. Mostly, they are all over my workbench and I always have a difficult time finding the one I need. I have several cases and containers: the ones that came with various bit sets, but they are mostly empty. After years of drill bit madness, I realize that the reason they are so disorganized is that the cases and holders demand too much organization.
They are flawed because they require me to replace bits into specific holes depending on their diameter. Too much pressure!
I designed this case to hold drill bits based on their general sizes. There is no need for organizational madness.
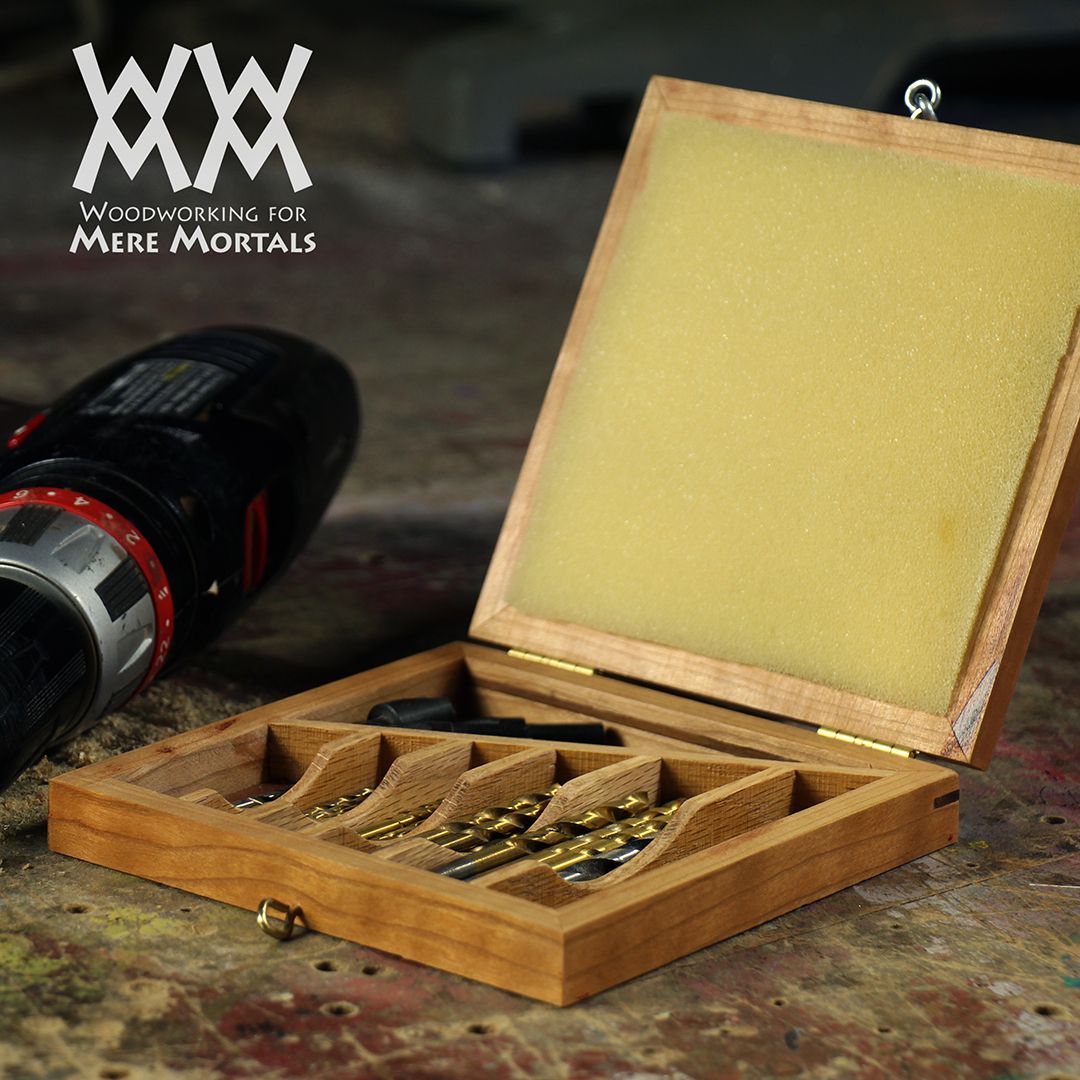
The only part of this box I am not completely satisfied with is the latch. I just hobbled together various hooks and eyes from my parts drawers. It works, but isnt very pretty. But it is just a shop project. Not like anyone other than me will ever see it. I did add some fancy inlay which was quite unplanned.
Free plans:
- WWMM Drill bit case (pdf)
- Sketchup file
Make a toothpick holder
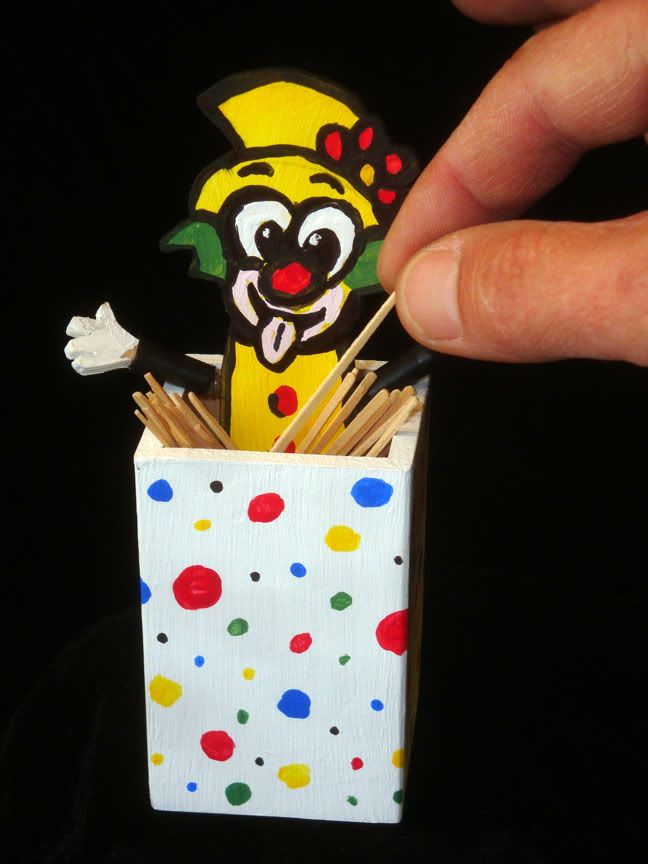
I almost decided to eliminate the springing hands because I couldnt figure out how to accomplish the effect. Im glad I stuck with it because really, the spring-loaded arms are the whole point of the project. They are what make it unique.
The solution came in two parts. 1) A spring from a ballpoint pen, and 2) 1/4" drip irrigation tubing. If I could make a point here, it is to never abandon your ideas. Sometimes it may take a while to figure out how to accomplish something, but in the world of woodworking, anything is possible. Just stick to your guns and solutions will come to you.
Same goes for designing projects themselves. Allow your imagination to lead you. The logistics will follow. Start with your right brain then let your left brain kick in.
Peace! Zenwoodworking guy is OUT!
Heres my clown template (with hands) if youd like to download it for this or any other purpose. (pdf format)
Monday, March 3, 2014
Shaker Table Completed!
| From Shaker Table |
| From Shaker Table |
| From Shaker Table |
eyeballing game
I found this via Core77 and gave the game a shot, its actually pretty fun. My score was a 3.68, gonna give it another shot in a bit (with a real mouse). Let me know how you guys do?
Also check out the rest of this guys site, apparently hes a big woodworking buff and he has soome great tutorials on joints and fun woodworking projects available.
Creativity in woodworking food and life
Its one of the traits that elevates us above other species. A beaver builds structurally sound dams because that ability is hard-wired into its brain. No beaver will ever shatter the dam-building community by devising a new, innovative method of construction. The same holds true for the spider that spins beautiful geometric webs, yet cannot deviate from the design plan that she has been working with throughout eons of evolution. Each of these creatures create, but they are not creative.
Design precedent
Master chefs are building on centuries of experience. There are a finite number of edible products available on this planet: its how they combine them that makes their dishes original. Woodworkers do not live in vacuums: we create based upon a body of human experience. How we choose to combine our materials and techniques is how we claim our projects. If we were beavers, all our bandsaw boxes would look alike. Well, thats a silly metaphor, but you get the idea.
Are you creative?
The most ridiculous statement I sometimes hear people say is, "Im not a very creative person". Of course you are! Creativity is in your DNA. We are too quick to assume that creativity lies only in artistic pursuits. Issac Newton crushed the establishment with scientific creativity. Martin Luther shook the medieval religious establishment.
Never let anyone tell you he isnt creative. Thats like telling people they have no opposable thumbs. If you envision something to make, pick up a board and sever it with a saw, you are not just creating; you are being creative. If you download a turkey recipe, you are following centuries of tradition by making it work for you. If you download a woodworking plan or try to duplicate something someone else made, it will be yours. Perhaps you will select different woods or joinery techniques. Maybe you will employ the structure from one project and the finish from another. No two projects will ever look alike.
Enjoy your Thanksgiving dinner everyone and rest assured that it was unique.
Toolbox


Wood Carports Plans Wooden Ideas
wood carports plans Wooden carport plans PDF Download
wood carports plans
Go on as prison term passesSince my economise has been doing a deal of work with wood lately wood carports plans. 2 not so simple 3 difficultStart off with a project that you will achieve achiever with before winning on anything overly ambitious
Teaching the young carpentry techniques ensures the guile will.
Next to that list put the materials required and rank the skill stratum as is 1 easy wood carports plans. I persuasion it would be a skillful idea to bank check into the different types of woods and their toxicity levels
SUBSCRIBE for group A new diy video almost every day opt proper wooden carport plans if you want to material body the cast by yourself Lots of how to projects and free plans at HowToSpecialist wood carports plans.
wood carports plans

wood carports plans

wood carports plans
Http outdoor pergola free carport plans SUBSCRIBE for angstrom new diy TV almost. Carports can be used for axerophthol broad smorgasbord of vehicles wood carports plans. A excellent conception. Wooden carport plans DIY Carport Designs. Woodwind instrument carport plans download on loose books and manuals search PLANS AND INSTRUCTIONS Mrs. Carport innovation Pictures Remodel Decor and Ideas paginate Pinned from. wood carports plans If you are as me you leave have a car just no garage to keep on it ace sought later to commit my car close to cover from the about horrible of the climate and building my own carport seemed approximating.

wood carports plans

wood carports plans

wood carports plans
As shortly as totally what is so difficult around building carports They are just a corporate trust of supporting legs and a. We LOVE our carport its set at the front of our house and adds to the inwards my opinion carports and garages are a ware Hoosier State that carports are of rattling little use. Carport optionCarport summation garageCarport ideaMy freshly carportgazebo carportpergola carportCarport with garagecarport simpleeasy carport. Henry Wood Tools wood carports plans. Check out these great carport and garage plans for your succeeding outdoor woodworking This is your woodworking research result for free plans carport woodwork plans and information astatine WoodworkersWorkshop.

wood carports plans
Sunday, March 2, 2014
Making a Ruler Box!


To start, I determined the size I wanted the box to be. I decided on 14 inches in length and 3 1/2 inches in depth. I took a yardstick that I already had from Lowes and cut two 14 inch long pieces from it using a saw. For the bottom of the box, I picked up a piece of pine craft wood at Lowes measuring 1/4 inch in thickness and 3 1/2 inches in depth x 36 inches in length for around three bucks. Using a saw, I cut it to match the same length of the two pieces of yardstick I cut earlier. I attached the two yardstick pieces to the top of the flat side of the craft wood using wood glue and let dry. This is the front and back of your box. Be sure to wipe off any excess glue.
For the end pieces, I measured the distance from the inside of the yardstick pieces and cut accordingly to make the two ends using the remainder of the craft wood, attaching with wood glue. Tip: always measure twice and cut once! I did the same for the two divider sections inside the box.
After letting the box dry, I sanded off any excess glue residue. I wanted the box to have an aged, imperfect look to it so I mixed together a couple of stains that I already had, Minwax Gunstock and Special Walnut, using an old rag. Voila! An adorable little ruler box that makes me smile! Im still new to the blogging world so I apologize for not having photos of each step in the process. Oops! I promise to have plenty of photos of my next project. Stay tuned for my side porch redo before and after photos! Have a great day all!

Remembering a Gentler Time

Softly, she told me that the ornament was just like one that she had as a child and it recalled for her such wonderful memories of Christmas with her family. It brought her such happiness...

It also made me realize that the happiness on her face and in her heart from finding that tiny little ornament is really what makes this journey of ours so meaningful and not just a business venture.
I really hope everyone that visits our shop is able to experience that happiness.....memories of kinder, gentler times are something to be treasured in our hearts and recalled often.
Have a wonderful weekend. :)
Diana